Table of Contents
Introduction
3D printing is a term that has been hyped for a long time. It’s a technology that is in essence not that new, but now more than ever is getting better and accessible to everyone. Today we take a dive into the world of 3D printing and what it really has in store for us and the world in the coming years.

What is 3D printing
Basically 3D printing can be described as: Producing 3D modeled objects by printing them with a 3D printer. It offers a new way to do fast prototyping without the need to create very expensive molds or stencils.
It has long been hyped to be the next big thing for:
- Everyday use: recreating objects, replacing broken parts
- Medical use: create patient specific casts or prostheses that fit better
- Weapons: In the news, 3D print a gun which can pass through metal detector, and is not registered with the authorities.
Although 3D printing has changed how prototyping works, a lot of misconceptions exist:
- 3D printing is slow, very slow
- Thus not usable to create batches of the same object
- Limited available materials (for hobby use)
- 3D printed parts are strong but not as strong as molded or cast parts (mainly for plastics)
Types of 3D printing
3D printing is not one technology, there are many different methods how a 3D print can be created. Wherein the method the print is created varies depending on the technology used.
Different technologies use different methods and materials, each with their distinct advantages and disadvantages.
Some of these methods include (but are not limited to):
- Fused deposition modeling (FDM)
- Stereolithography (SLA)
- Digital Light Processing (DLP)
- Masked Stereolithography (MSLA)
- Direct Metal Laser Sintering (DMLS)
- Selective laser melting (SLM)
- Electronic Beam Melting (EBM)
Below we will go into detail for some of the more used types:
- FDM
- SLA, DLP & MSLA
- SLS & SLM
Different printing methods
FDM: Fused Deposition Modeling

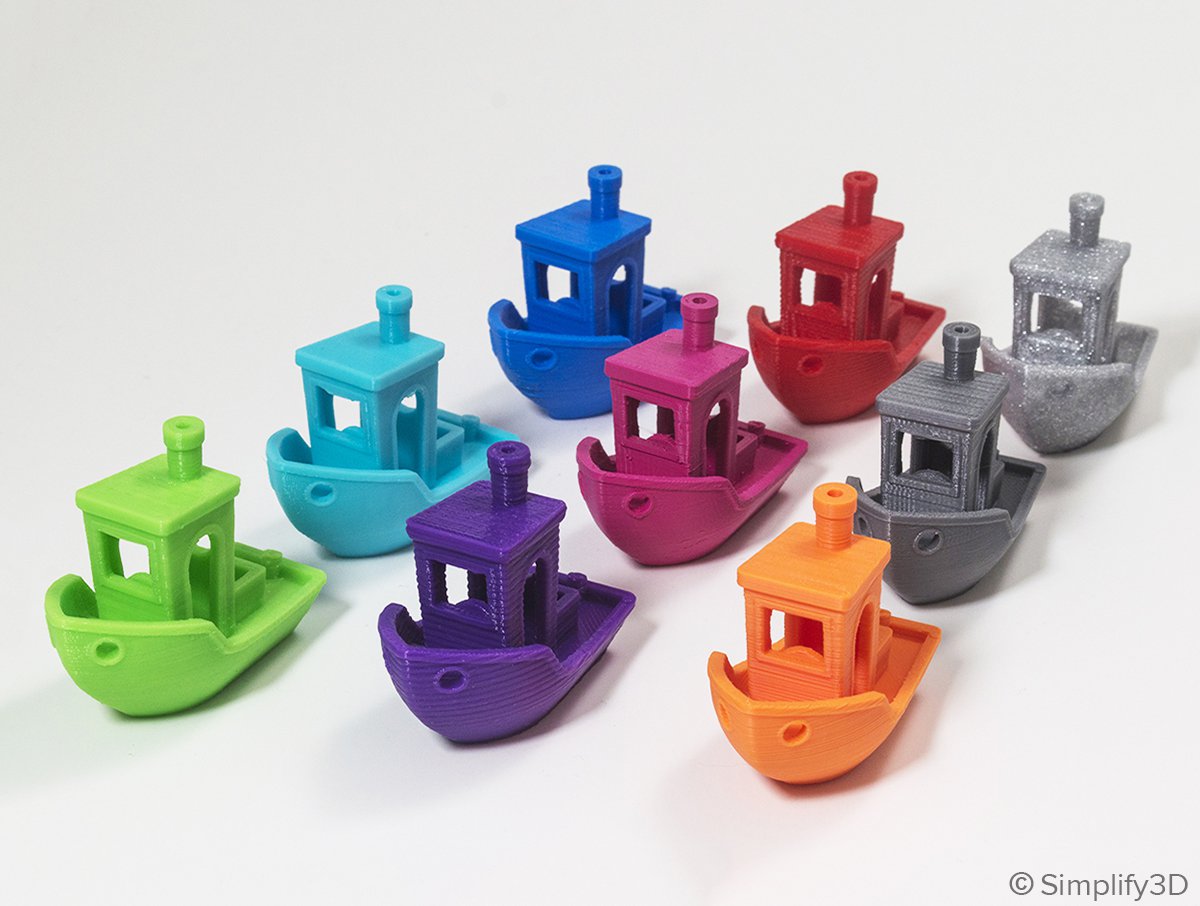
With Fused Deposition Modeling the printed model is created by melting a compound (this being mostly PLA/ABS/PETG) and tracing the model layer by layer, each layer thickening the model as the printer deposits more material on the model.
In the image above all the main pieces for an FDM printer are visible. The nozzle is moved on the Z-axis, and the build plate is moved on the X/Y-axes by stepper motors which control the movement up to one tenth or even one twentieth of a millimeter. A spool of material is fed into the nozzle which melts it and deposits it onto the model by use of extrusion wheels/stepper motors.
FDM printers are widely available both ready to use and as kits that require assembly, these are also the most affordable type of printers on the market. You can always extends your printer and even print replacements for broken components.

SLA & DLP: Stereolithography & Digital Light Processing

These types of printers work by using either a laser or a projected image to cure a UV-reactive resin.
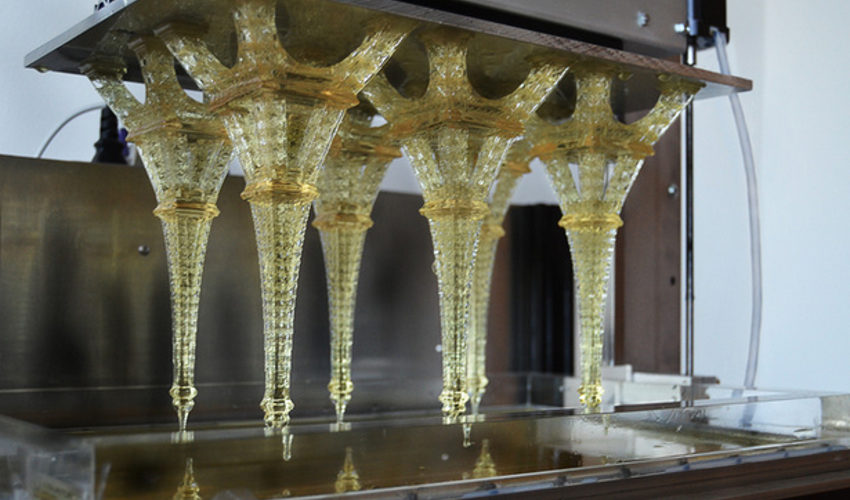
With Stereolithography a powerful UV laser traces the object layer by layer, like the FDM printer does, however it does not deposit material itself, rather it cures the resin in the tank at the point where the laser is.
Because SLA uses a laser that is moved by mirrors, it can have a very high resolution, the disadvantage is that it is as slow as an FDM printer since each layer needs to be traced.
With Digital Light Processing an UV projector is used, it projects an entire layer at once, this results in a lower printable resolution for the object, but yields a significant speed increase since an entire layer is printed at once, there is no need to trace the entire layer.
Masked SLA is a cheaper version of the DLP method where a LCD based photomask is used in front of an UV-LED array instead of an UV based projector.


The images above show the distinct difference between these two (three) methods. The SLA method has much better quality compared to the DLP or MSLA methods.

DMLS & SLM: Direct Metal Laser Sintering & Selective Laser Melting

Direct Metal Laser Sintering and Selective Laser Melting are two of the more industrial methods of 3D printing. They are used, as the name suggests, to 3D print object in metal.
The main procedure for both methods is similar.
A moving arm pushes metal particles across the printing area, after which a powerful laser will trace the current layer of the object being printed.
This will fuse the particles together and is also where the biggest difference between the two methods exists.
Once the current layer is finished, the arm moves back and forth again, bringing in a new layer of metal particles.
With DMLS the particles are sintered together but the metal itself has not melted completely, is hasn’t flowed. When using SLM instead, the metal particles are actually fully molten and they fuse together much more firmly creating extremely though objects!
Objects created with these methods are free of internal stresses and defects that are common and hard to prevent with other production methods. The parts can also be printed as a whole rather than needing assembly of different parts, which further reduces the possibility for failures or errors during assembly. This however comes at great cost, literally, since these methods are very expensive and require state of the art equipment! Because of this high cost they are used in industries where the fault tolerance is very low, such as aerospace.
Different printing materials
As you might have noticed in the previous section different printing methods require different printing materials. In the section below we’ll go more into detail about these materials.
Polymers/plastics
FDM and DLP printers require polymer based materials. These are plastics or plastic like materials that are easy to print.
PLA (PolyLactic Acid):
- Biologically degradable
- Melting (printing) temperature: 170 ⇔ 230 °C
- Can be used to print medical supplies
- Many colors available + glow in the dark
- Not UV stable
- Cannot withstand high temperatures, do not leave it in the sun inside a car!
ABS (Acrylonitrile Butadiene Styrene):
- Not biologically degradable
- Melting (printing) temperature: 220 ⇔ 260 °C
- Many colors available + translucent
- UV semi stable
- Can withstand higher temperatures than PLA!
- Harder to print than PLA and requires venting since the fumes are toxic!
PETG (PolyEthylene Terephthalate Glycol):
- Not biologically degradable
- Combines best of PLA and ABS
- Melting (printing) temperature: 220 ⇔ 250 °C
- Many colors available + translucent
- UV semi stable
- Can withstand higher temperatures than PLA!
- No toxic fumes, odorless
These three materials are commonly used in FDM printers. The most and safest to use is PLA, which is fully bio degradable (over a long long time), it also is the easiest material to print with. ABS is stronger but not biodegradable and produces toxic fumes when printing, it also requires very precise cooling during printing or the print will warp and the layer will detach, ruining the print. PETG is the best of both worlds, it is stronger than PLA and does not produce toxic fumes. There are a lot more materials available, oftentimes with very specific properties to make it act more like rubber, be more flexible, glow in the dark,… All these different materials require different print settings and some can be quite hard to get right, experimentation is key! Some materials also exist that can be used in a medical context, these are however not printed with the average FDM printer since they need to match very high standards for medical use for both internal and external use.
DLP materials:
- Liquid polymer that undergoes photopolymerization, meaning it is cured/hardened by exposure to UV light.
- Many different types of resin are available
- Biodegradable ⇔ Non biodegradable
- Flexible ⇔ Sturdy
- Polymer ⇔ Ceramic
- Low temp ⇔ High temp
- There are also resins available that cure with regular “daylight” and do not require special UV lights to cure the printed object
Metal

For the moment metal printing is not for the mere mortal, however larger companies/industries are already using 3D printers capable of printing metal. Not all methods can print all metal materials, some like SLM are limited in the metals it can ‘print’.
Most printed metals:
- Titanium
- Aluminium
- Cobalt chrome
- Gold
- Silver
- Copper
- Bras (alloy)
Aerospace industries nowadays print both external and internal parts of rockets and their engines, these objects are stronger and have less internal defects and stresses. The medical industry can also print patient specific prostheses in titanium allowing for better patient recovery after injuries.
Concrete/construction
In more recent years concrete printing has caught some attention and people are experimenting with it. It has some nice advantages:
- Allow cheaper construction of small buildings
- Faster construction
- Small area mini homes for the developing world -or- after natural disasters
The video below shows a working concept of a small 3D printed ‘home’, it is constructed in place and can be finished in very little time.
FOOD

Food printing has been a hype for a long time. Culinary experts have been experimenting with the concept, but also companies like NASA for astronauts.
Simple items like chocolate and dough can already be 3D printed, based on the FDM method, the edible object is printed layer by layer. There are ‘robots’ that can print more complex items, but these are not actual 3D printers and more automated assembly machines, the boundary between 3D printing and assembly can become a bit blurry. At this point in time it is not yet possible to print entire meals from raw base ingredients. This will no doubt be developed further as time progresses.
Getting started with 3D printing

Getting started with 3D printing is not easy, it can be very daunting. There are a lot of things you need to take into account
Since it is still relatively expensive, you want to ask yourself these questions:
- What type of 3D printing do I want?
- What is the best (price/quality) printer available?
- Will I use it enough to justify the purchase?
- You could also just order a printed model online!
Getting things right is hard:
- Printer calibration
- Model slicing & print settings
⇒ 3D printing remains an intensive trial and error process! Only begin if you are willing to invest the necessary time into it. If at first you don’t succeed, try again and again and again and again!
Thankfully the online hobby community is very large and generally very helpful. You will need to model your object or download it from a ‘makers’ website. You will need to slice your model with settings for your specific printer, and adjust these settings based on the quality and speed you want.
Online resources:
- Youtube channels:
- Forums:
These YouTube channels and forums are an invaluable resource when getting into 3D printing, they contain loads of information, do’s and don’ts. By watching videos and reading articles you can prevent mistakes gaining insights faster in how 3D printing works and what is possible.
Maker websites:
These websites provide vast libraries of models and some even offer an online modeling tool. Before diving deep into your modeling software check if someone else had the same idea and created the object you want. ⇒ good artists copy, great artists steal - Picasso
Modeling software:
These software suites let you create and export models. All of these programs are easy to pickup (except for the CAD software) but are extremely hard to master! There are also many alternatives available, but these are the most common ones.
Slicing software:
These software suites let you convert your 3D models into GCODE.
GCODE is the ‘language’ that 3D printers use to print an object.
It contains a set of instructions for stepper motors, extruders, fans and other peripherals that make up a 3D printer.
This code is generated from the 3D model and is layer based hence the name ‘slicer’, since it slices the model into layers and translates this to the GCODE required to print.
The slicer software also takes into account overhangs and infill.
Overhangs are parts of the object that have no support beneath them, they float, but since material cannot just float in midair supports are generated that are removed (by the user) when the print is finished.
Infill is a way to speed up printing, the inside of and object would normally be 100% filled with material, this is slow and uses a lot of print material. By setting the infill percentage a structure is generated inside sealed of parts of the model that contains a lot less material while maintaining most of its strength. By playing with this setting a lot of time can be saved!

The future
The future is now!
3D printers are advancing at an extremely rapid pace, new printer models arrive on the market almost weekly. Chinese firms are producing very high quality printers and production quality is going up.
The future will bring a lot more:
- Better printers
- Finer resolution
- Lower cost
- Lower maintenance
- More and more versatile materials
- A 3D printer in every home?
- Repair stuff yourself ⇔ Throw away stuff that is broken, built to break…
Resources
Getting into 3D printing requires a lot of research, A LOT! Since the technology is advancing so fast I have not listed any specific printers, they are reviewed on youtube and forums where experienced members of the community test them and give their verdict on them.
Printing methods & materials:
Online resources:
Maker hubs:
Modeling software:
Slicers:


